
What is Keil

Installation Procedure for Keil IDE for embedded development is a German software subsidiary of Arm Holdings. Keil MDK is the complete software development environment for a wide range of Arm Cortex-M based microcontroller devices. MDK includes the µVision IDE and debugger, Arm C/C++ compiler, and essential middleware components. It supports all silicon vendors with more than 8,500 devices and is easy to learn and use. Keil MicroVision is a free software which solves many of the pain points for an embedded program developer. This software is an integrated development environment (IDE), which integrated a text editor to write programs, a compiler and it will convert your source code to hex files too.
How to download Keil µVision
- Keil download source: https://www.keil.com
- This will open the web browser page as shown in the figure below:

- From the list given on the top of this web page select download as shown in the figure below,

- When you click on this section the webpage giving the downloads option will appear as shown in the figure below,

- As is obvious from the description given under the name of each of the category the product downloads will give you the setup of the Keil IDE and the file downloads will provide you some of the sample codes that are built and run on Keil.
- We here need to download the IDE first and install it afterwards so that we can implement our coding portion using this IDE so the category we should select here is product downloads as shown in the figure below,

- When you click on this category the following webpage will appear as shown in the figure below,

- As here we are interested in downloading an IDE for TIVA TM4C123G which a Cortex and ARM device hence we must download a developing environment for Cortex and ARM devices i.e. MDK-ARM.
- This will show you a window asking you to fill out the form for your personal information only for the company record. The form that will be displayed is shown in the figure below,
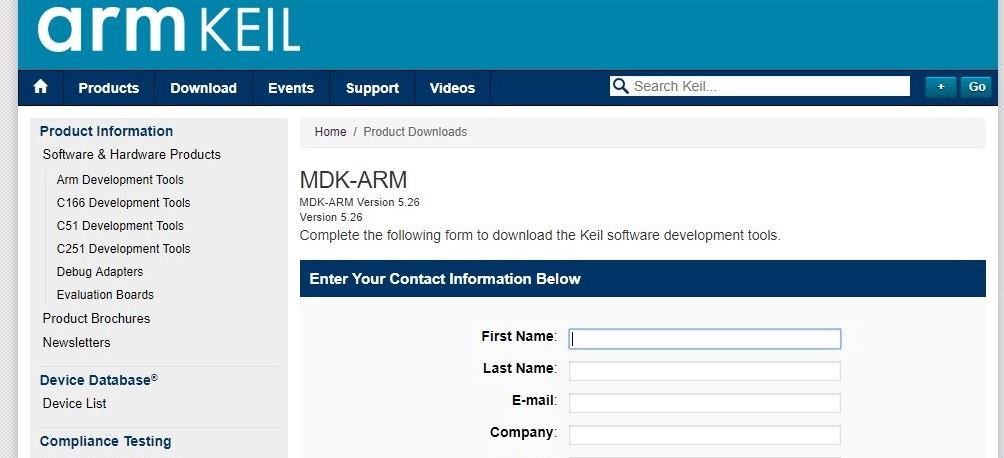
- Fill out the form shown in the above figure and press submit this will show you a page showing the features and the setup file for MDK-arm as shown in the figure below,
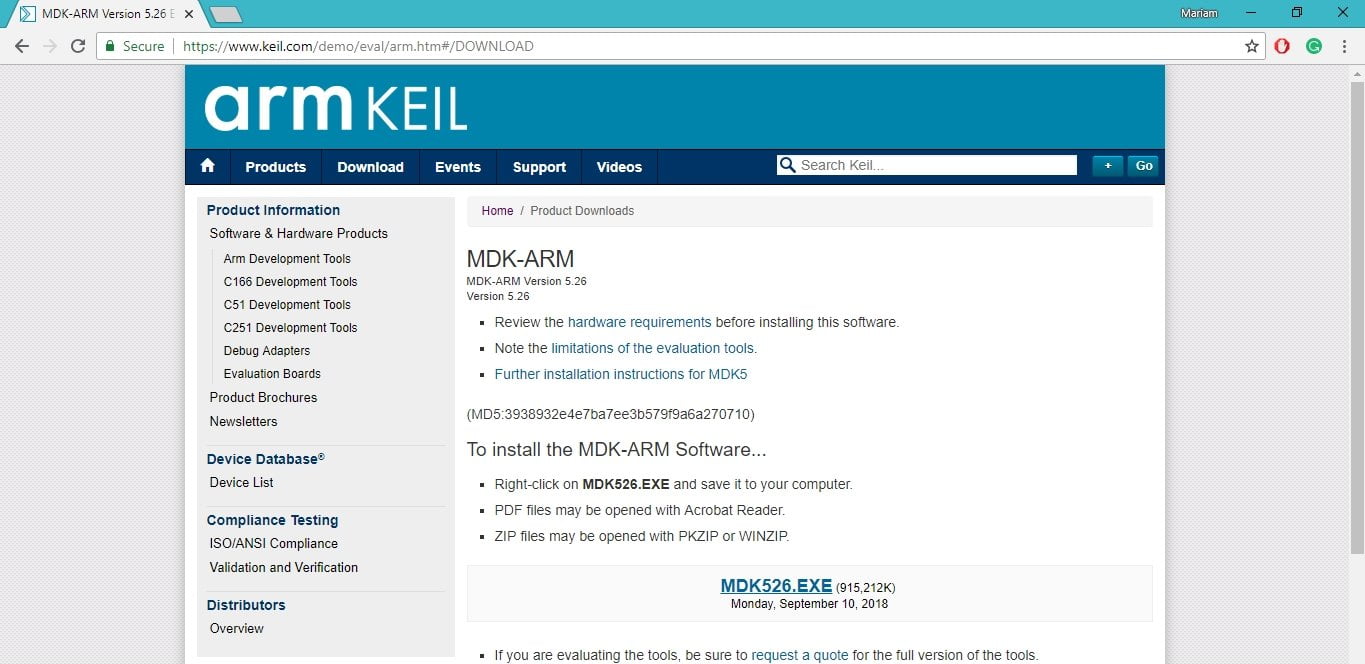
- The mdk526.exe file shown in the figure above shows the setup file for the Keil u vision version 5.26 which is the latest version of Keil so far.
- Click on the .EXE file at the bottom of the page as shown in the figure below, this file contains the setup of Keil.

After you click on the file your PC will ask you where to save the setup (.exe) file. Select the folder of designation where you want to save the file and hit enter as shown in the figure

- The size of the setup file is around 900Mb it will take some time to download in your PC from the online source. Wait for the download to complete before proceeding further.
- After the download is complete the downloaded folder will be placed in the folder you designated it during the installation time as shown in the figure below:

How to install Keil µVision
- The downloaded folder will already contain all the drivers needed to run the code and it also includes a pdf file that is the datasheet of the microcontroller TM4C123G as shown in the figure below:

- This data sheet also contains every little information about the microcontroller, its’ onboard pins, and also its libraries and alternate functionalities including all the addresses of each pin.
- Now open the folder present inside the downloaded folder it will contain the setup file which needs to be installed.
- The name of both the folders will be the same because the external folder was only the drivers and datasheet inclusion folder and the main mdk file is inside the second nested folder. Inside the nested folder, the files shown in the figure below are present.
 This folder present here includes the necessary drivers and libraries needed to run simple code in Keil IDE. These folders are necessary for the successful installation of Keil and the version you downloaded will automatically install all the necessary drivers you just have to keep them in the same folder. From the folder select the setup file as shown in the figure below:

- Double click on this file and the setup will start installing necessary files for the IDE automatically. The setup will first ask for the administrative permission to made the required changes in your PC.
- Click yes and then the setup will show the window shown in the figure below:
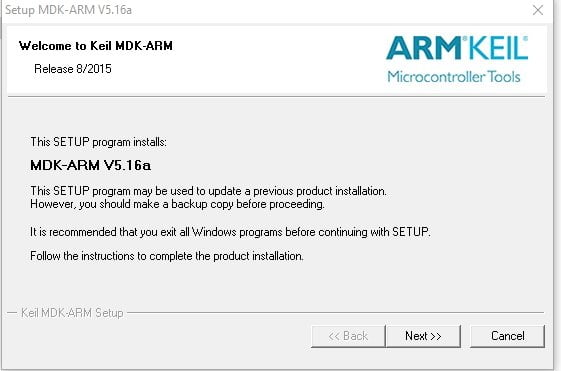
- This is the welcome screen and it only shows the features of the Keil version to be installed and the products that will be downloaded automatically along with the setup.
- Simply click next and you don’t have to do anything else here. The next screen after clicking the next button that will appear on the setup window is shown in the figure below:

- This page is the license agreement page. On this page, you agree to the terms and conditions required by the company to agree to in order to use any version of any of the products launched by that company.
- Check the highlighted arrow box as shown in the image above and click next to proceed with the installation part. The next window to be appeared is shown in the figure below:

- This window will ask you to select the folder where you want to install the Keil files, drivers, and libraries. Browse the designated folder where you want to place the libraries by clicking on the browse key and then click Next. The window that will appear after clicking the next key is shown in the figure below:

- In this window the setup will ask you to enter some necessary details i.e. personal information of the customer who is going to use the specified product to be installed here in the future.
- It has nothing to do with the installation and is only for the companies’ record to keep a track of how many people are using there launched product and what are the companies or institutions they for which they are currently using the companies’ product.
- Simply enter the first and last name of the (PC holder, most recommended), or the customer who is going to use the IDE. Enter the name of the company or institution you are currently working in and at the end enter your email ID and then click Next. The next window that will appear after clicking next is shown in the figure below:
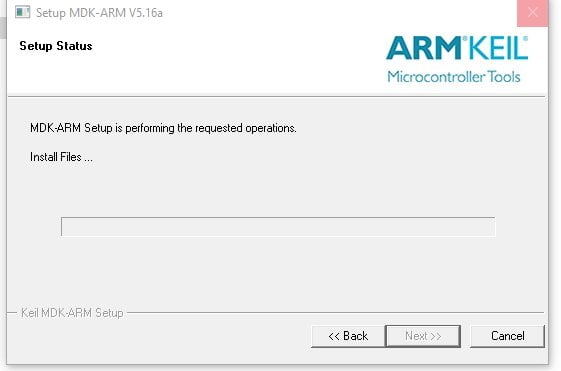
- This is where the installation status of your product will be shown. It will take several minutes to install the setup. So, minimize the app and let the setup install all the drivers needed as it will do it automatically.
- The setup will automatically download all the required files you need not to do anything but to wait for the installation to complete. After all the drivers have been collected the setup will ask you for the permission of installation as shown in the figure below:
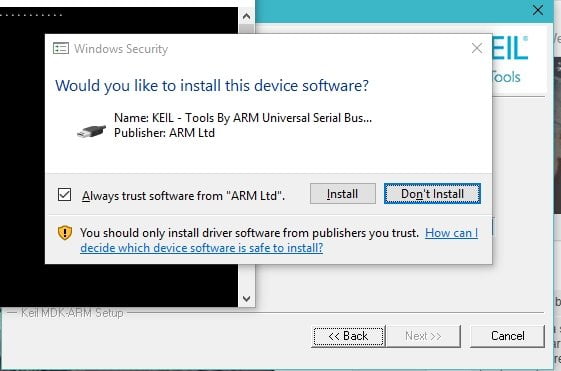
- This is where you give your consent that you want to install the IDE of Keil and the installation will begin.
- After the installation is complete the setup window will ask you to finish the installation successfully as shown in the figure below:

- After you finish the installation with the release note check box checked the setup will open the browser and show you the latest release of the notes of the Microcontroller Development kit (mdk) as shown in the figure below:
- But if you uncheck the box before finishing the installation this page will not be displayed and you can check these updates anytime in future using the link given below,
- Release notes: file:///C:/Keil_v5/ARM/HLP/Release_Notes.htm
- After that, a pack installer will open automatically and ask you for any updates you need now to install regarding the IDE. The pack installer is shown in the figure below,
